背景
kamailio,opensips分别有dispatcher,load_balancer模块来实现sip信令负载均衡和分发功能。
那么作为全能型的freeswitch,也有mod_distributor模块来实现该功能。
mod_distributor只支持invite不支持register请求的负载均衡和分发。官方文档
本次测试的freeswitch版本为:
1.10.7-release+git20211024T163933Z883d2cb662~64bit
测试
编译
在freeswitch的源码编译目录下的文件modules.conf中取消注释:
1
|
applications/mod_distributor
|
重新编译源码,这样就能编译mod_distributor模块。
配置
- 在
freeswitch运行路径下的conf/autoload_configs/modules.conf.xml中,加载mod_distributor模块:
1
|
<load module="mod_distributor"/>
|
- 在
conf/autoload_configs/distributor.conf.xml中,配置分发策略, 原始示例内容为:
 1
 2
 3
 4
 5
 6
 7
 8
 9
10
|
<configuration name="distributor.conf" description="Distributor Configuration">
  <lists>
    <!-- every 10 calls to test you will get foo1 once and foo2 9 times...yes NINE TIMES! -->
    <!-- this is not the same as 100 with 10 and 90 that would do foo1 10 times in a row then foo2 90 times in a row -->
    <list name="test">
      <node name="foo1" weight="1"/>
      <node name="foo2" weight="9"/>
    </list>
  </lists>
</configuration>
|
修改配置为:
1
2
3
4
5
6
7
8
|
<configuration name="distributor.conf" description="Distributor">
  <lists>
    <list name="2gw" total-weight="2">
      <node name="gw1" value="sofia/gateway/gw1" weight="1"/>
      <node name="gw2" value="sofia/gateway/gw2" weight="1"/>
    </list>
  </lists>
</configuration>
|
可以通过调整weight值来改变分发策略,总数之和为total-weight。
- 在
conf/sip_profiles/external/中,参考example.xml,分别创建两个网关文件:gw1.xml,gw2.xml。
一个转到172.16.4.113上,一个转到172.16.4.114上。gw1.xml的示例:
 1
 2
 3
 4
 5
 6
 7
 8
 9
10
11
12
13
14
15
16
|
<include>
  <gateway name="gw1">
  <param name="realm" value="172.16.4.113:5060"/>
  <param name="expire-seconds" value="60"/>
  <!--/// do not register ///-->
  <param name="register" value="false"/>
  <!-- which transport to use for register -->
  <param name="register-transport" value="udp"/>
  <!--How many seconds before a retry when a failure or timeout occurs -->
  <param name="retry-seconds" value="30"/>
  <!--Use the callerid of an inbound call in the from field on outbound calls via this gateway -->
  <param name="caller-id-in-from" value="true"/>
  <!--send an options ping every x seconds, failure will unregister and/or mark it down-->
  <param name="ping" value="25"/>
  </gateway>
</include>
|
这里配置了ping功能,25秒检测一次网关是否可用,用于后面dead gateways功能测试。
- 在
conf/dialplan/default.xml中, 配置拨号计划, 示例内容为:
1
2
3
4
5
6
7
|
<extension name="3-way gateway distributor">
  <condition field="destination_number" expression="9980$">
    <action application="set" data="continue_on_fail=true"/>
    <action application="set" data="hangup_after_bridge=true"/>
    <action application="bridge" data="sofia/gateway/${distributor(2gw)}/1004" loop="2"/>
  </condition>
</extension>
|
- 重启服务
运行
软电话A1003注册到上面设置的拨号计划的sip服务器172.16.4.111上,
软电话B和C用户1004分别注册到172.16.4.113(gw1)和172.16.4.114(gw2)sip服务器上。
然后A软电话拨打9980号码, 此时会拨打gw1上,如果gw1有该坐席,不管是接通还是挂断,
都不会再拨打gw2上的1004用户。但是如果在gw1上INVITE返回了错误的信令,
则会拨打gw2上的1004用户。
正常的信令图:
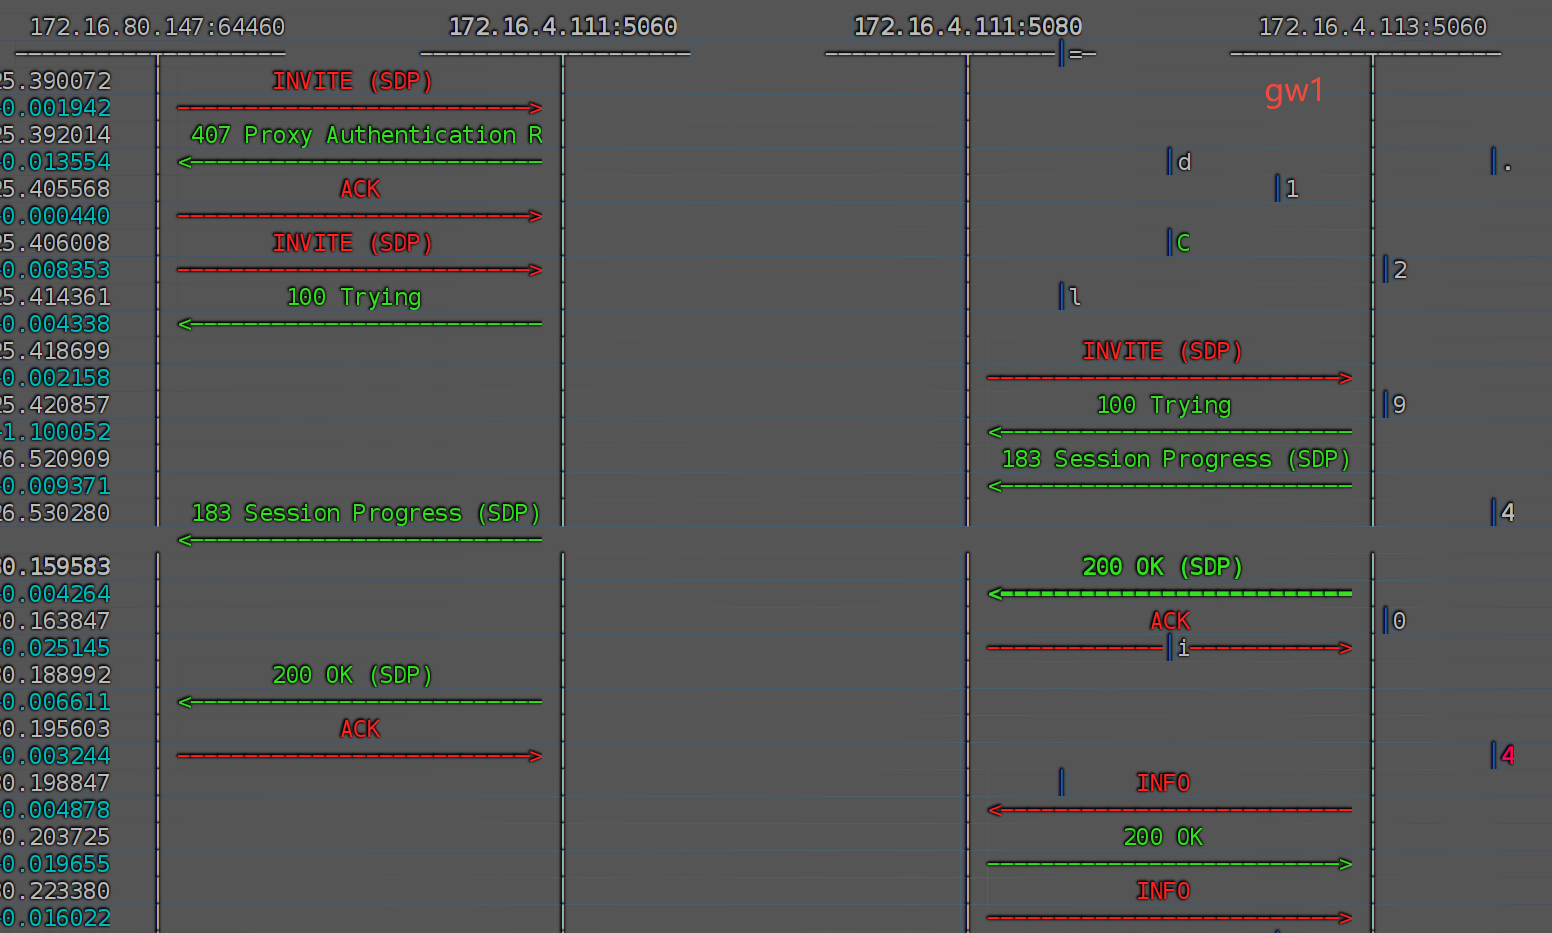
gw1失败,gw2成功:

正常情况会按照轮询策略来分发invite请求。
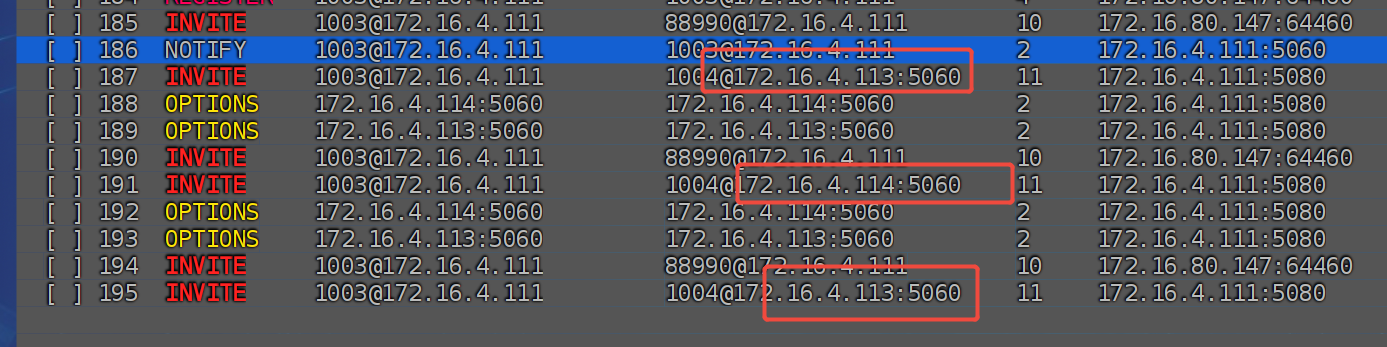
可以看到,第一通电话转gw1,第二通电话转gw2,第三通电话转gw1,依次轮询。
如果其中一个网关不通,能否不再往该网关发送invite请求呢?
也是可以的,使用dead gateways,修改conf/dialplan/default.xml中, 配置拨号计划, 示例内容为:
1
2
3
4
5
6
7
8
9
|
<extension name="3-way gateway distributor">
  <condition field="destination_number" expression="9980$">
    <action application="set" data="continue_on_fail=true"/>
    <action application="set" data="hangup_after_bridge=true"/>
    <action application="bridge"
        data="sofia/gateway/${expand(distributor 2gw ${sofia(profile external gwlist down)})}/1004"
        loop="2"/>
  </condition>
</extension>
|
停掉gw1网关,当看到日志[WARNING] sofia.c:6503 Ping failed gw1 with code 503 - count 1/0/1, state DOWN,
然后A软电话拨打9980号码, 此时只会拨打gw2上的1004用户。
可以看到信令交互上,确是如此。

总结
mod_distributor只能使用简单的轮询和权重策略来分发invite请求。- 使用网关的功能,可以自动检测到下线的网关,然后不再往该网关发送
invite请求。